Rock the Test!

The testing season is upon us (bleh).  OK, we don't take high stakes testing in second grade, but our third grade neighbors do.  This year, our Student Council coordinated a school wide event where each primary class adopted an intermediate class to support and cheer on through the test taking process.  I decided to go with a "Rock the Test" theme (because it's just too darn cute).


I was so happy to have been able to adopt the third grade class next door because many of the students were in my class last year and the teacher is one of my closest friends! Take a look, maybe you'll be inspired to adopt a class this year!

To get things started, we decorated their door.  Doesn't it look adorable?


The little rock stars are from Tiffany Gannon.  I made the sign and glued it to a few layers of fancy scrapbook paper.

Click {here} for your own {FREE} "Shhh! We're Rockin' the Test" sign.

https://drive.google.com/file/d/0B_Xl6AW_iMadakcwNmxCcWxydU0/edit?usp=sharing

No need to request that I share it, I have already done so.  Simply download it to your computer.

We also made this poster for the third graders to display at the front of their room.  My students wrote words of encouragement around the lettering I created.


I found these super cute pencil toppers while stalking Pinterest.  I may have jumped with joy when I did because they fit our "Rock the Test" theme perfectly!


You can find these free pencil toppers from Stephanie McConnell {here}.

We also drew pictures and wrote letters to each of the third graders. 


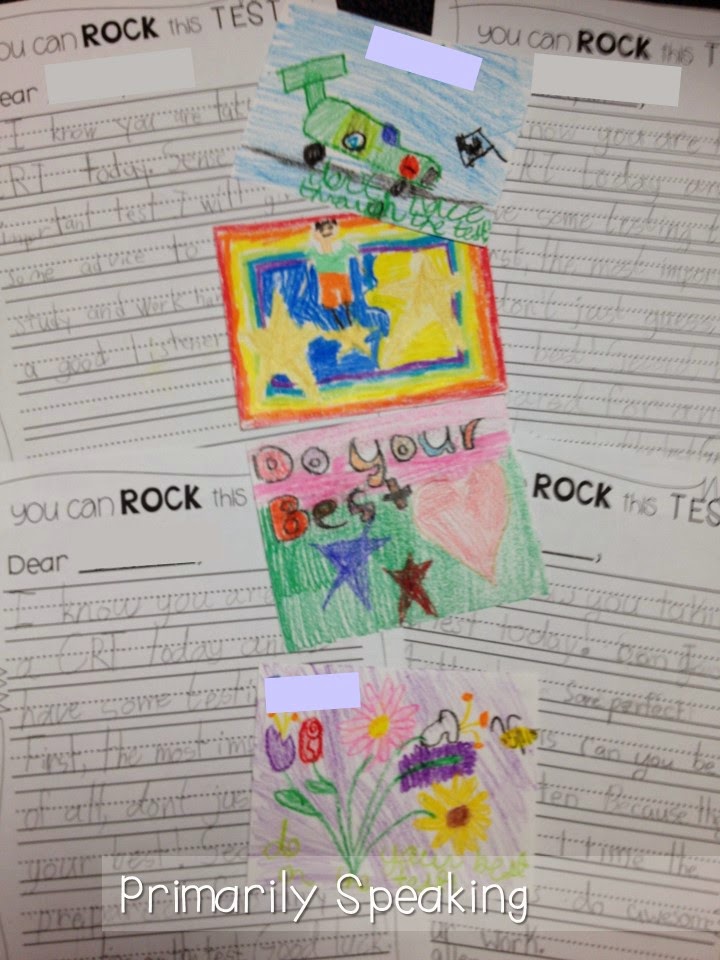
The writing paper was included in Tiffany's Rockin' Out the Test pack.


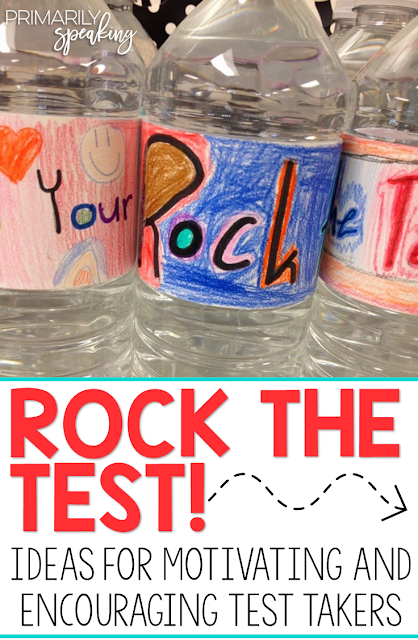
That's not all we have planned for our neighbors!  We are going to send them some refreshing water with custom made labels.  Testing is hard work!  I saw this idea on Pinterest and knew that my students would love making a special water bottle label.  They turned out so cute!


To make the labels, I simply peeled off the old label, measured it, and then cut some copy paper to that size.  The students decorated the new labels and then I taped them to the bottles.  Easy peasy!

Finally, I also put together a goodie jar.  A little sugar usually motivates me!


You can find this adorable, free, label from Tessa Maguire {here} on TpT.

It was a lot of fun finding ways to motivate these students during testing.  If your students are getting ready to test I wish them (and you) the best of luck!  And, if you aren't testing, but would like to cheer on another class, I hope you've seen some ideas that you might be able to use.

Be sure to visit my Testing Time board on Pinterest for even more test motivation ideas!


Toodles!

DON'T FORGET IT, PIN IT!


Share It:

Keeping Things Organized! {Five No-Fuss Ideas for an Organized Classroom}

Teachers have a lot of stuff.  A lot.  We like to use our stuff over and over, and we like to be able to find things quickly and easily because, let's be honest, we just don't have a lot of time on our hands.  That's where being organized comes in handy!


I thought it might be fun to share with you a few of my favorite, no-fuss ways of staying organized.  These examples are just a few ways to keep the clutter at bay, yet still allow for easy access to resources.  I hope you can use an idea or two!

First up, picture books.  We all have them, and most of us have lots of them.  I store mine in my filing cabinet. I have two filing cabinets (4 drawers each).

I am currently using three drawers to store all the picture books that I use to teach various units and lessons.  I separate the books with manila file folders. Nothing fancy, but it's highly functional and I can easily find what I need.


Each file folder is labeled and the books for that category are placed behind the folder.


How about all of those task cards, scoot cards, I Spy cards, etc. that we all love and use? (See below). I've accumulated a lot of these over the years and I use them all the time, so I need to be able to get to them easily. 


I organize these materials by subject, in shoe box sized tubs. I store the tubs in my closet on wheels.  We call it a wardrobe (but to this day, I still wonder why it is called that).  I hot glued a laminated label to the box so that I can easily find what I need year after year. As you can see, the labels are handwritten.  Keep reading to find out why this is my preferred M.O.


I know that printed labels are super pretty and all the rage, but sometimes I need to reorganize my bins and let's be honest, it isn't the greatest use of my time to be reprinting new labels all the time.  Sharpie can be removed with hand sanitizer and a bit of elbow grease, which allows me to relabel with ease, as frequently as needed.  Plus, I'm the only one who sees these labels, so functionality wins in the end.  ;)

NOTE: Some people prefer rubbing Expo marker over the Sharpie to remove it from laminated surfaces, but my go to is hand sanitizer and a tissue (or paper towel). 

This storage system works for my math related Scoot cards, I Spy cards, etc. too.  While I didn't grab a picture of them, I do organize my math manipulatives in the same manner. Dice, counters, student clocks, and so forth are kept in similar labeled bins (some are slightly larger, of course). 


To keep my daily materials organized, I have relied on this staple from Lakeshore for the past 9 years.  I'm not crazy about the colors, but (once again) functionality supersedes aesthetics in this case.


Next to (and beneath) these tubs I have two baskets.  I use these baskets to store small items and/or oversized items for each week. This way small things don't get lost in the tubs and big things don't make them fall over (my reading TE is pretty top heavy, so the basket is the perfect place to store this item).


Instead of putting these items in the bins, where they get overlooked or lost, I can easily grab them from this basket.  It's also a great place to store "filler" activities, like the pink set of cards in the lower right hand corner.


I have a lot of center activities.  These days, they mostly make appearances as "fast finisher" activities, but that doesn't mean I'm not organized about how I store them!  I place each of the center activities into its own file folder. 


The activity pieces are placed in a zip top baggie and I put a highlighter mark on the recording sheet master (it doesn't show up on copies and this way I always know which page is my master).


I store all of the file folders in these bankers boxes, which I found at Target a few years ago.


These are just a few of my favorite ways of keeping things organized.  I hope you can use an idea or two!

Looking for more ideas?  You can check out more of my organizational ideas HERE.

I also have a classroom organization board on Pinterest with useful ideas.  Check it out!


Toodles!

DON'T FORGET IT, PIN IT!


Share It:

A Tasty St. Patrick's Day!


I know that leprechauns and Lucky Charms are popular this time of year, but maybe you don't like leprechauns.  Or, maybe you're sick of graphing those crunchy, little marshmallows.  Why not try something different like hosting a Green Tasting Party?  


A colleague shared this idea with me several years ago, and I just love it.  It's different, it's memorable, and it's fun.   

What is a Green Tasting Party?
A Green Tasting Party is a fun experience where students sample a variety of green foods.  Don't worry, we can make it meet those standards.  Keep reading.

Here is a picture of the Green Tasting we had in our classroom today.  I decorated the table groups as shown and set out plates of green foods while my students were at their daily Special.  They were so excited when they walked in and saw everything!
 

Of course, fancy butcher paper table cloths and colored clover cut outs aren't necessary, but they do add to the fun.  ;)

What do you serve at a Green Tasting Party?
Anything that is green!  Seriously, anything.  If it's green, and safe for your allergy kiddos, serve it.

Our menu included:
  • Key Lime cookies
  • celery
  • green olives
  • green apple
  • sweet pickles
  • lime jello
  • sugar snap peas
  • broccoli
  • lime sherbet/Sprite punch (I called it Leprechaun Punch)
  • nopalitos
In case you aren't familiar with nopalitos, they are basically small pieces of pickled cactus.  They have a small kick (spice).  Most of the kids loved them!


The nopalitos are the "string bean" looking things on the upper left hand side of the plate. 


A few other green foods you could serve include:
  • kiwi
  • green beans
  • Lima beans
  • Key Lime yogurt
  • zucchini
  • cucumber
  • lettuce
  • cabbage
  • salsa verde
  • Key Lime squares
  • pistachio pudding

What if the kids don't like the different food items?
It is a tasting, so they don't have to like all of it.  They just need to taste all of it (but, of course, you could handle this however you'd like).

I told my students that the only rule was they had to taste every item, but they didn't have to like it, or even finish it.  They just had to try it.

What do you do after the tasting?
Make them write.  These days, everything must be tied to something academic (the standards), and we all know that writing about an authentic experience will help our young writers to produce quality work.  So, have them write about their Green Tasting Party. 

You could have your students write about the experience as a narrative, or they could write an opinion piece where they tell about which food they thought was the best. 

I'm sharing some writing pages you might find useful.  Click here to grab these for free.


What are the benefits of hosting a Green Tasting Party?
Well, since you asked:
  • It allows the students to practice good manners and etiquette
  • It gives students an opportunity to socialize within the learning environment
  • It makes for a memorable experience
  • It is fun - and learning should be fun
How do you cover the cost of the food?
Here are a few ideas on how to get those green foods:
  • ask students to send in food items that are green (one item per student)
  • ask students to send in $1 to help cover the cost
  • purchase the items yourself (if you are able to, and willing to, of course)

Our tasting was a lot of fun.  The students were willing to take risks and try new foods, like the nopalitos.  It was fun to hear them critiquing the food as they ate. This showed me that they were really into the experience.  And, at one point, I looked over at one table group and they were clinking their punch glasses together. So cute!

Thanks for stopping by today!

Share It: